


If you want to catch up with the Use Every Scrap Knitalong, simply click on the image above to see all of the posts.
Welcome to the next instalment of the Use Every Scrap knitalong! So, now we’ve knitted some tubes, with nice uninterrupted sequences of stripes, be they of the hand-dyed or scrappy variety, that are a bit longer than our feet. Lovely! Except, of course, the small matter of not being able to try them on anymore – our pesky heels get in the way. So today, that’s where we turn our attention.
There are many, many ways of knitting a heel, each with their own uses. For our purposes, an afterthought heel is going to do very nicely, and here’s why…
Afterthought heels work really well with self-patterning yarn and colourwork socks. They let you knit an uninterrupted tube and then, as the name suggests, put the heel in after the fact. They’re also really easy to work (if you’ve ever worked a toe on a top-down sock, it’s very similar!) and let you have fun, if you’d like, with contrast or complementary colours – perfect for scrappy socks!

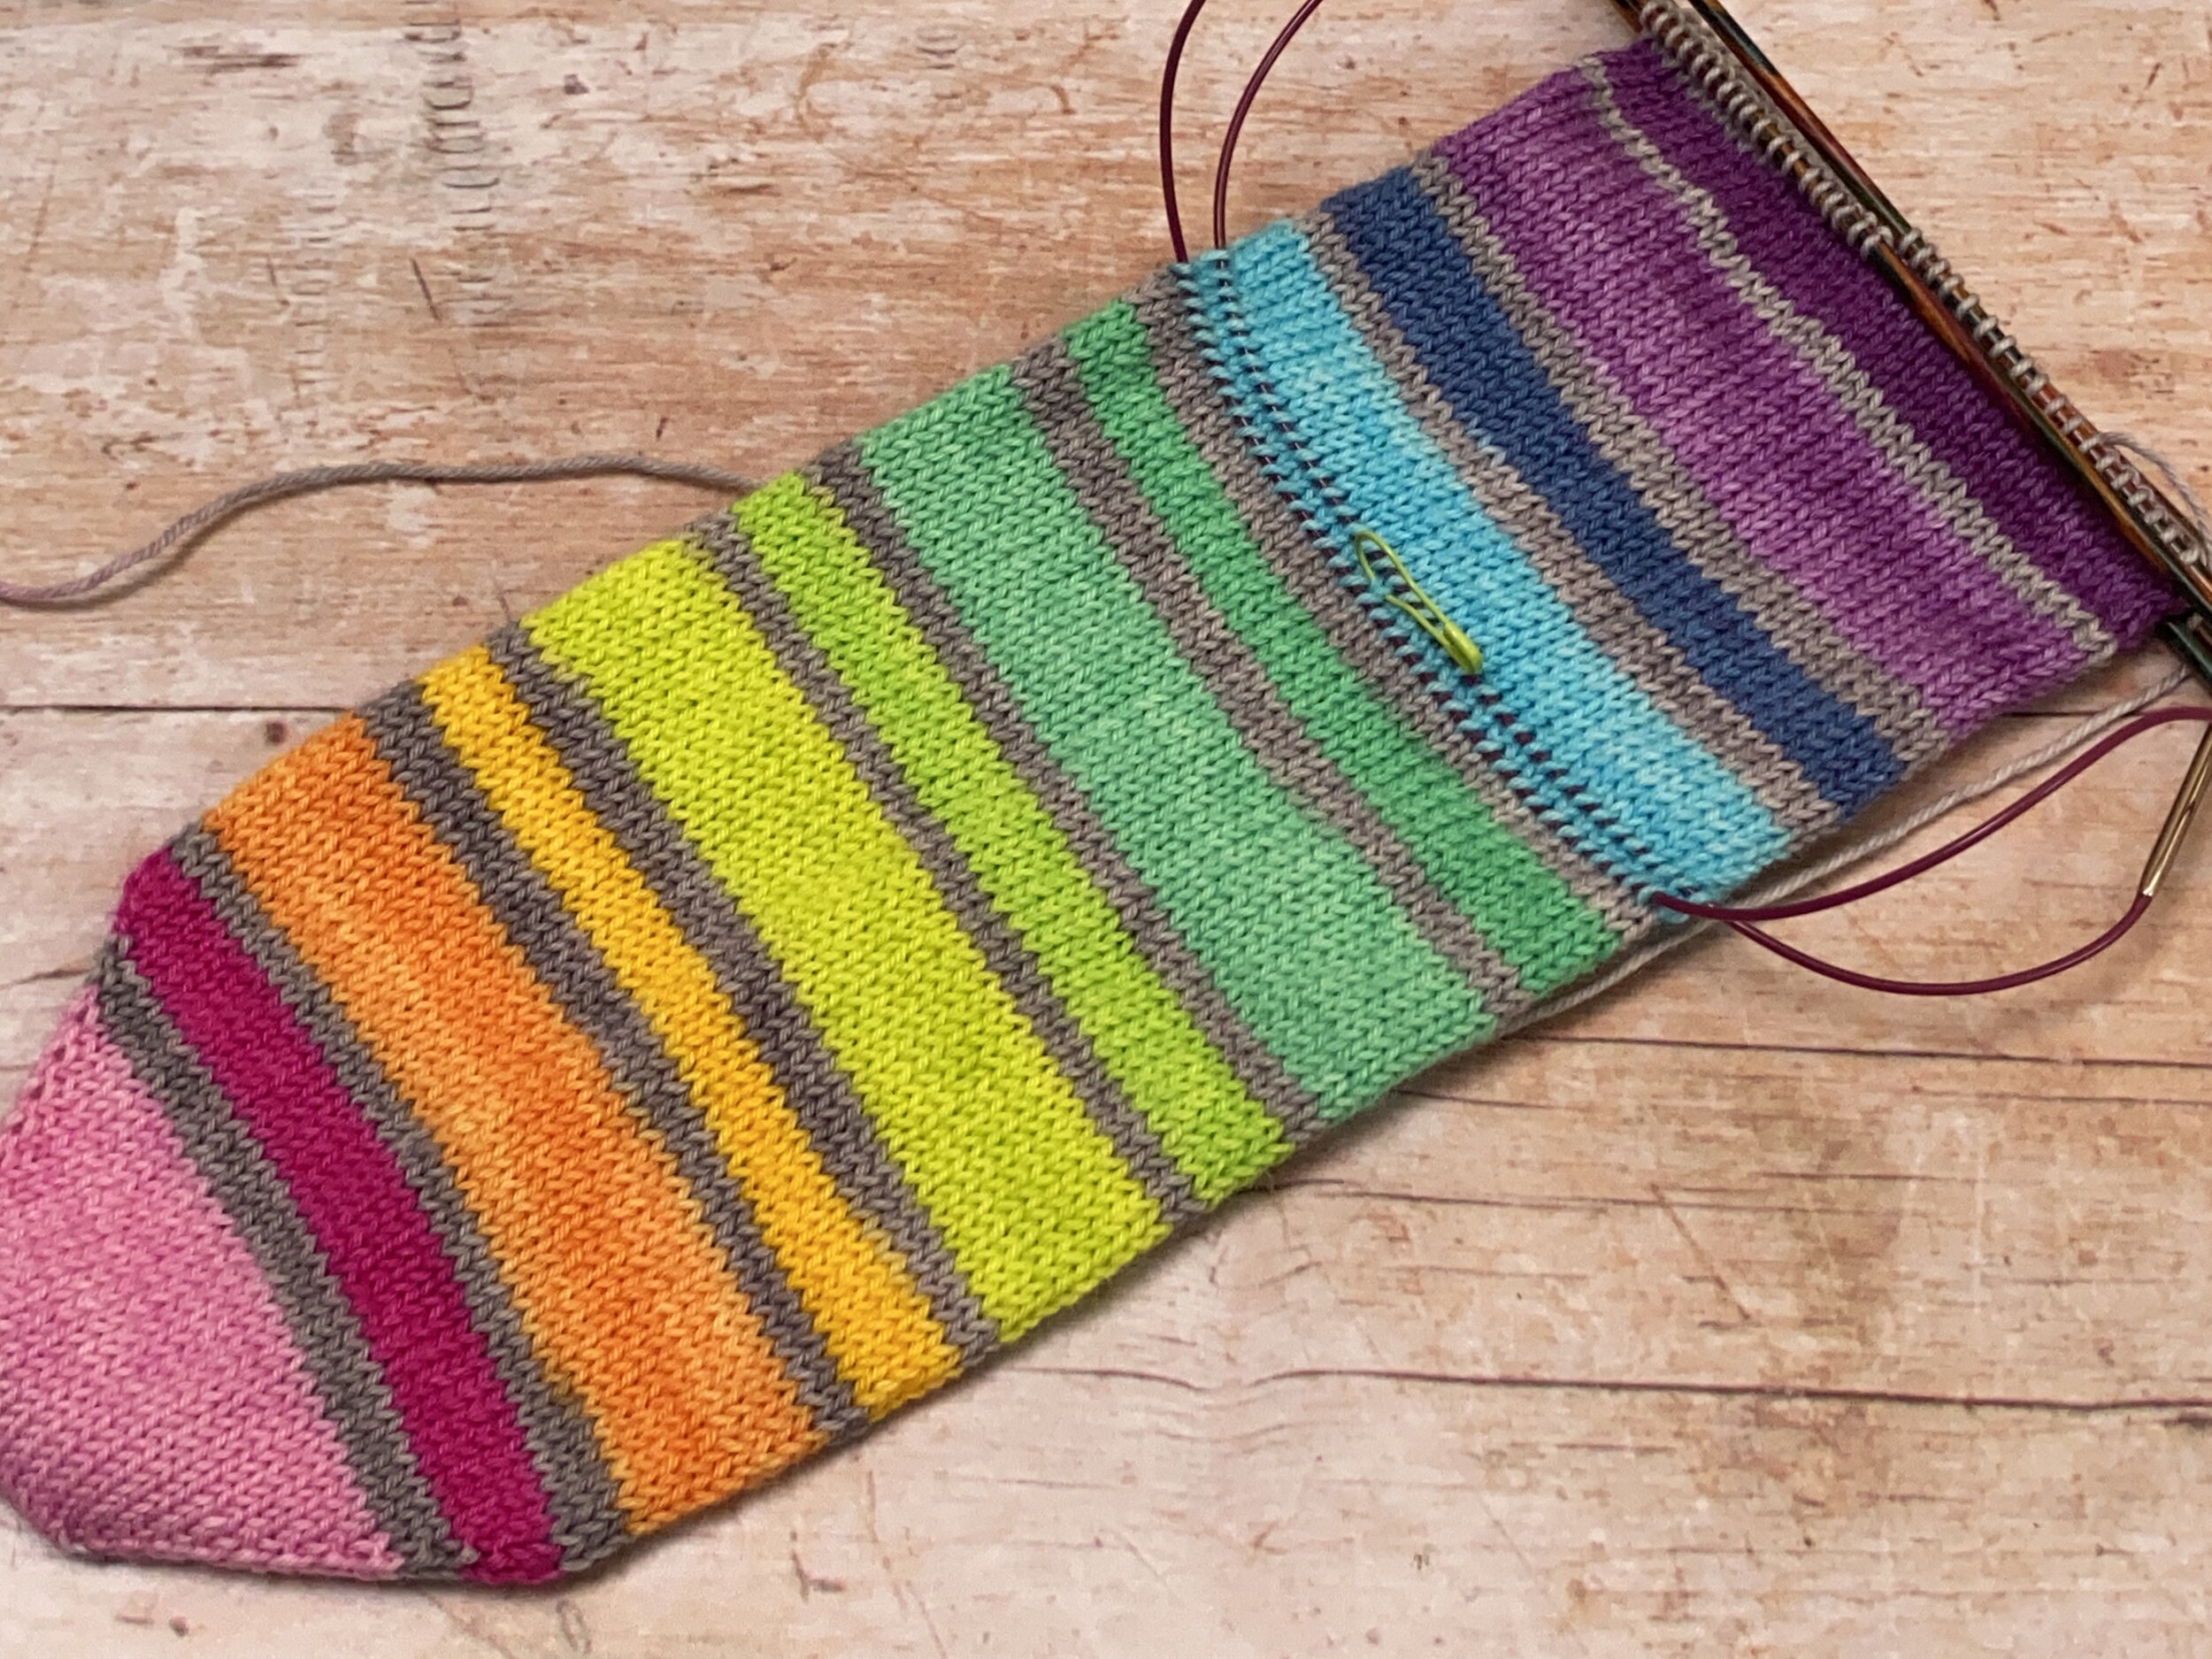
Here’s one I made earlier — so pretty! As you can see, for these, I chose to pull from the other end of my Fab Funky Fibres ball so as not to interrupt my stripe sequence, but using another yarn would have worked equally well.
The other thing about the heels above is they’re true afterthought heels. And that’s what we’re going to be learning to do today! What makes it “true”? Well, often, patterns using afterthought heels (or pockets, or thumbs … the method is the same) will instruct you to work to a certain length, knit, in the case of a sock, half your stitches (or slightly more) with waste yarn, then carry on knitting with your main yarn. When you’re ready to insert your heel, you go back to the waste yarn, unravel it and knit the heel across the resulting live stitches. There’s nothing wrong with this method at all, but it does mean that, when you’re knitting your tube round and round, you must know where you want that heel to go. For this reason, Elizabeth Zimmerman called them forethought heels.
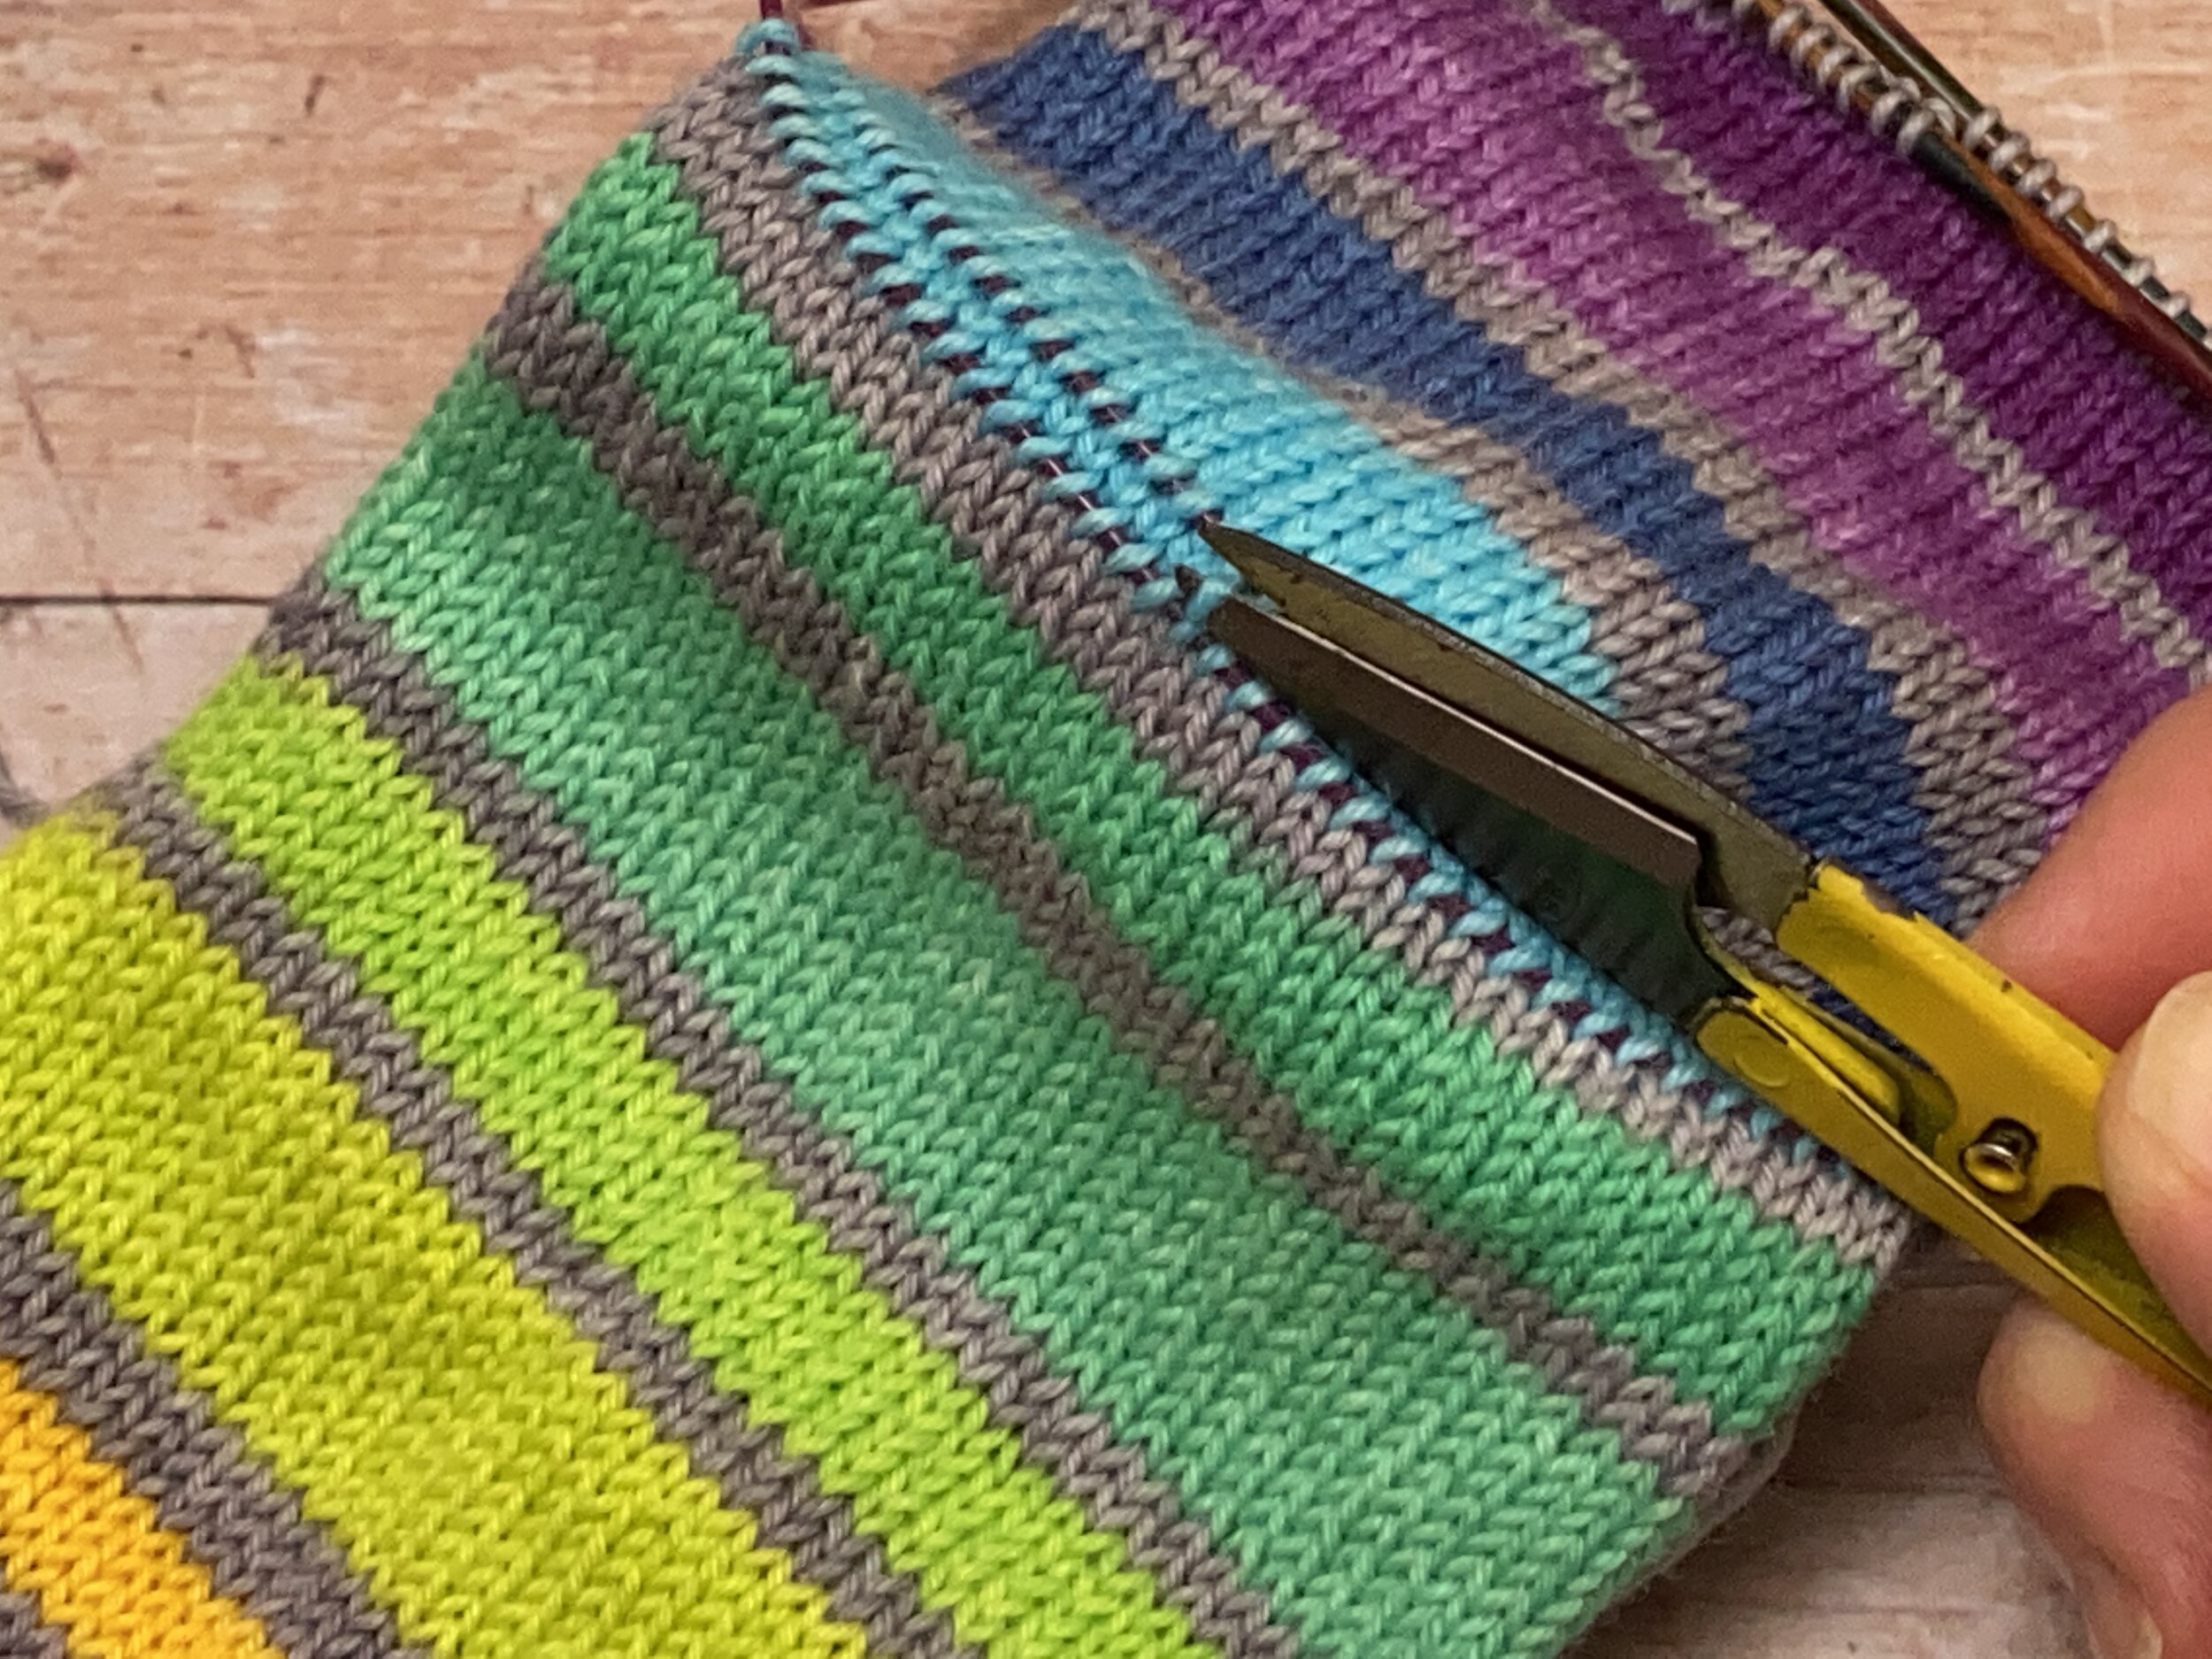
In a true afterthought heel, by contrast, there’s no waste yarn, no forethought. When you’re ready to insert your heel, you decide where it goes, make a single snip (which is much less scary than it sounds!), get live stitches onto your needle, and you’re away. These heels have the added bonus of a tail of yarn at each end of the opening that can be used to close any pesky gaps that might occur at the corners. So grab your sock(s)-in-progress, a tape measure and some scissors, and let’s do this!

Where to place your heel…
So the first task is to work out where to put your heel! Remember when you measured your foot last time? Find that number!
My feet are 24cm [9.5in] long.
The foot of your sock needs to be around 0.5cm [0.25in] less than your actual foot length. So you need to do foot length minus 0.5cm [0.25in] to work out your sock length.
24cm - 0.5cm = 23.5cm [9.25in]
I want my finished sock to be 23.5cm [9.25in] long.
Your heel will be worked in a way that is very similar to your toe, with approximately 1cm [0.4in] of straight knitting first. So measure the length of the toe increase section of your sock.
My toe increase section measures 5cm [2in].
I add to that the straight section: 5cm + 1cm = 6cm [2.4in].
This means that my finished heel will measure 6cm [2.4in].
Finally, to work out where to place my heel, I take my desired sock length and remove the heel length.
23.5cm - 6cm = 17.5cm [6.9in]
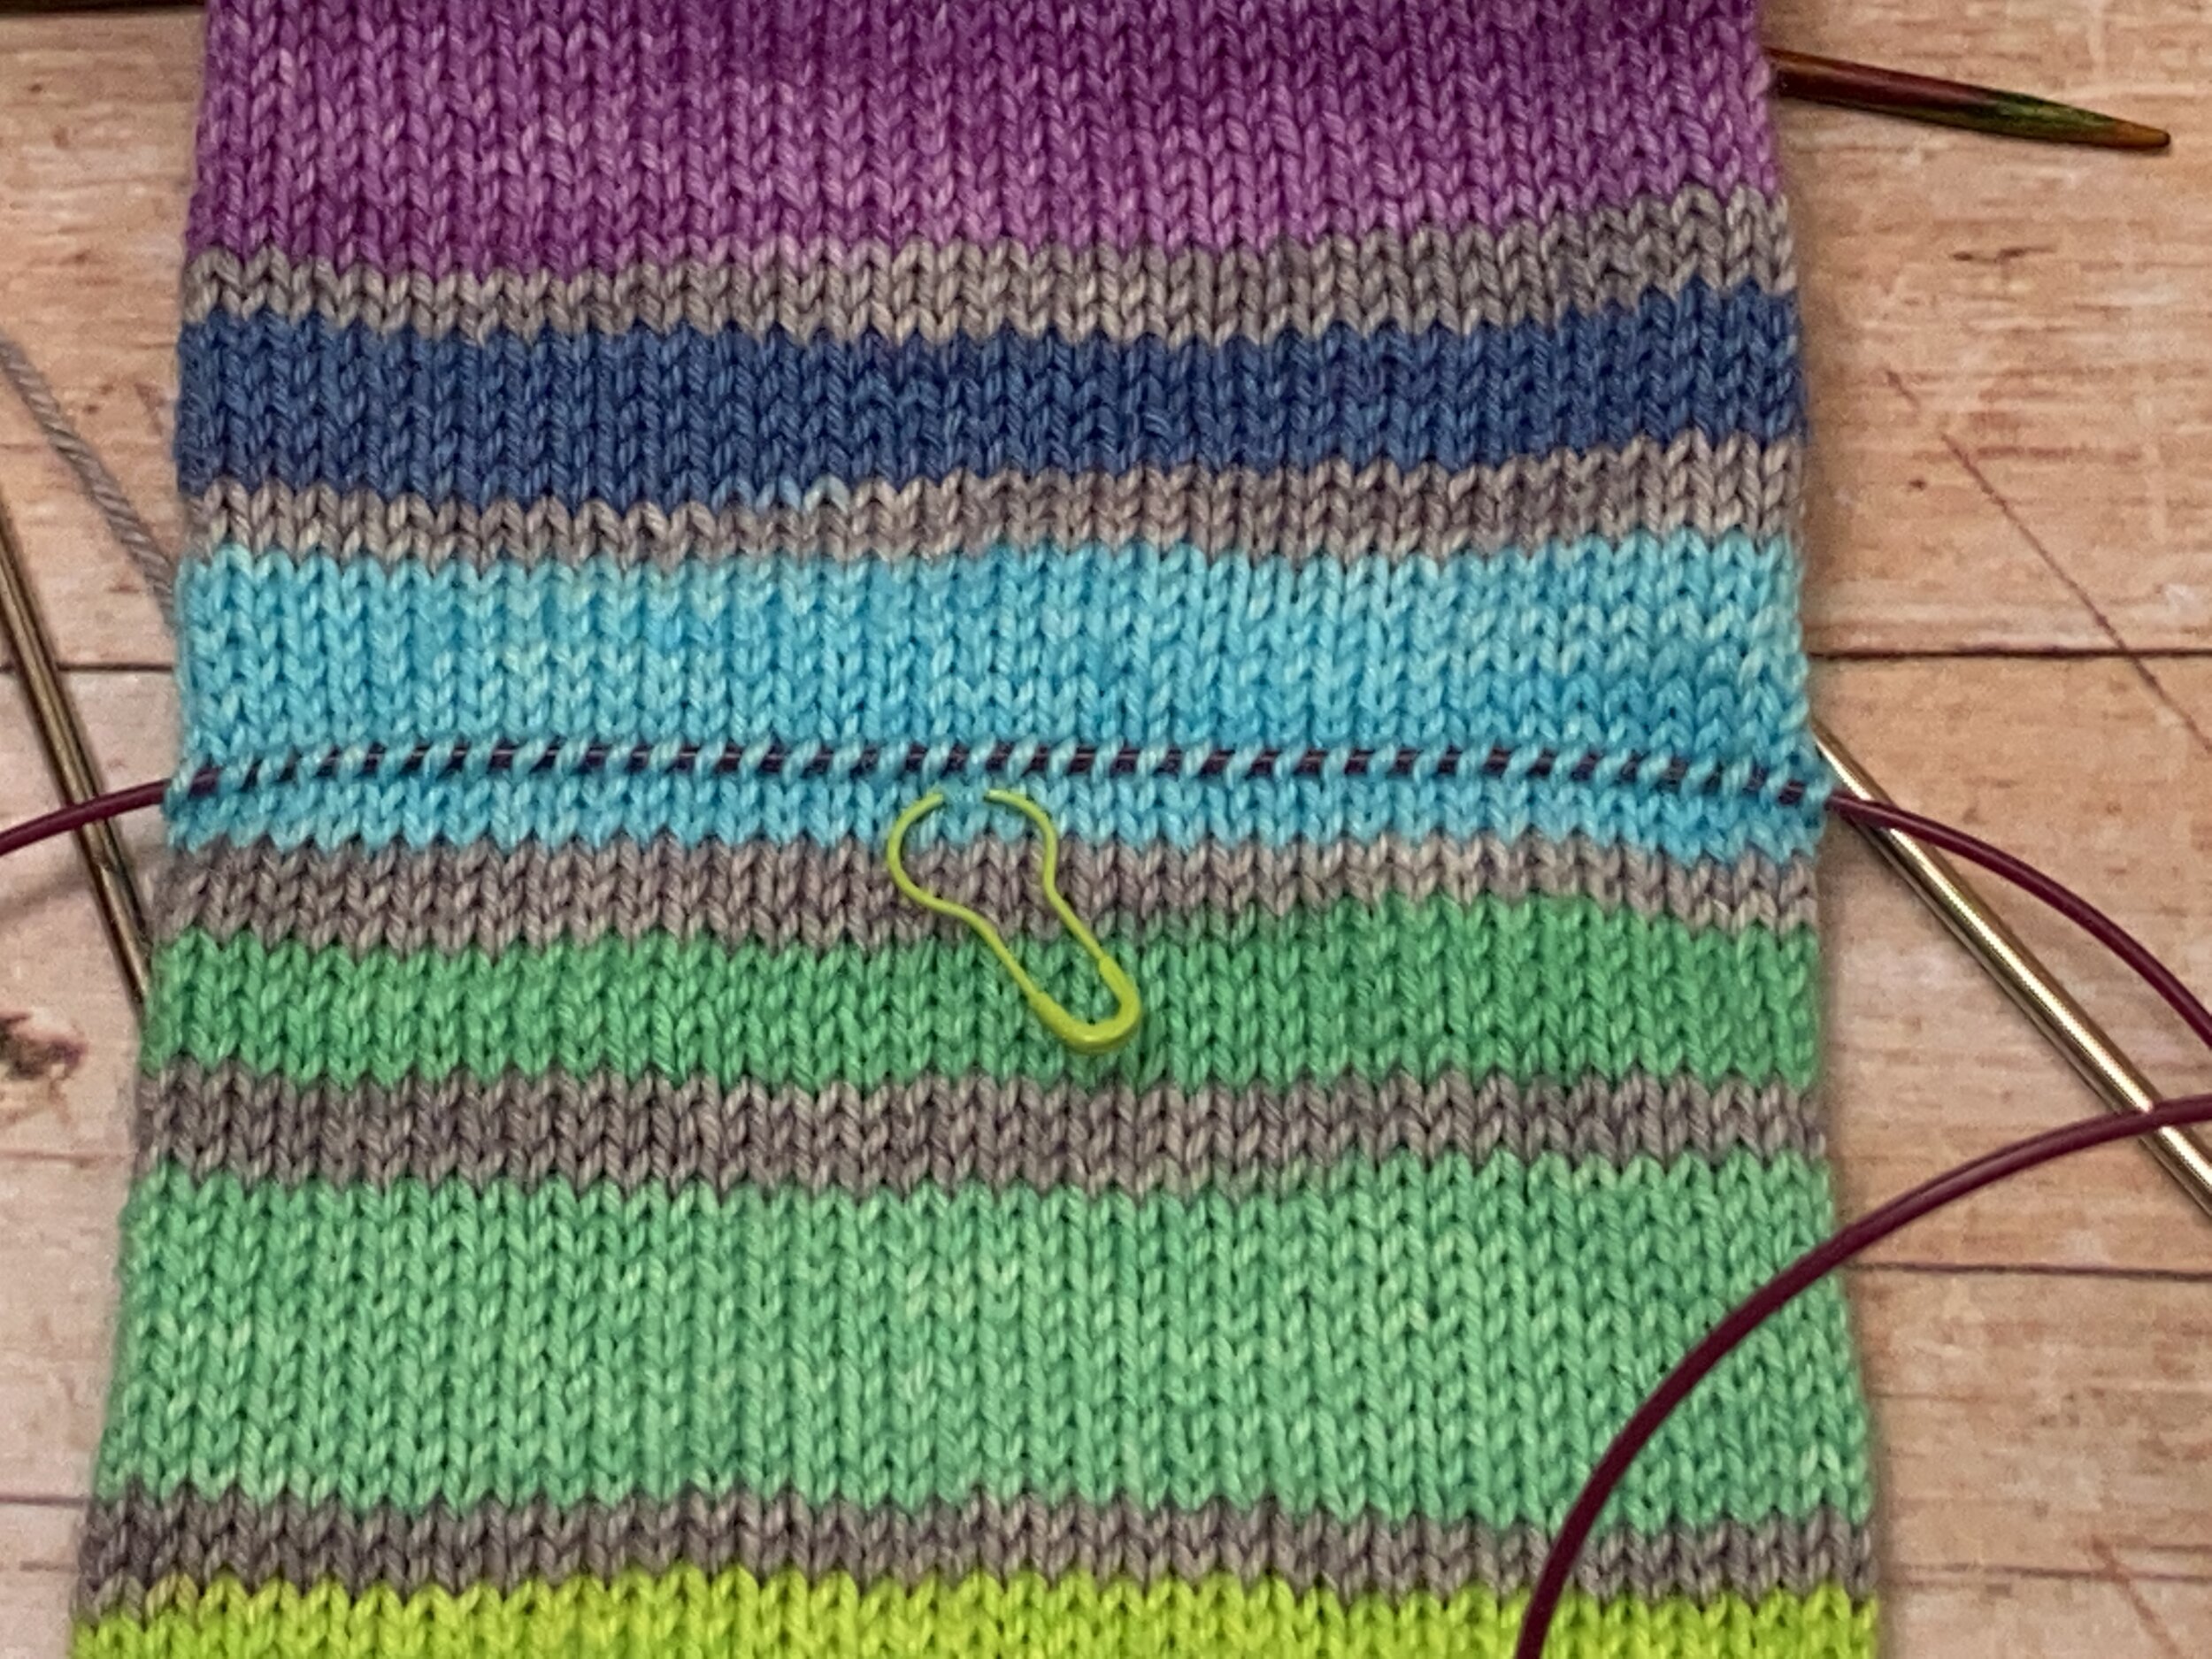
Measure this distance from your cast on at the start of your toe, and place a locking stitch marker in your fabric so that you know where your heel needs to be placed.
If you’ve got a favourite sock with a similar heel style, you could grab that and check the measurements too.

Once you’ve got a general idea of where you want to insert your heel, have a closer look at your stripe or pattern sequence to check that you’re happy with the heel being here. Once you’ve made your decision, pop a removable marker where you want the heel to be.
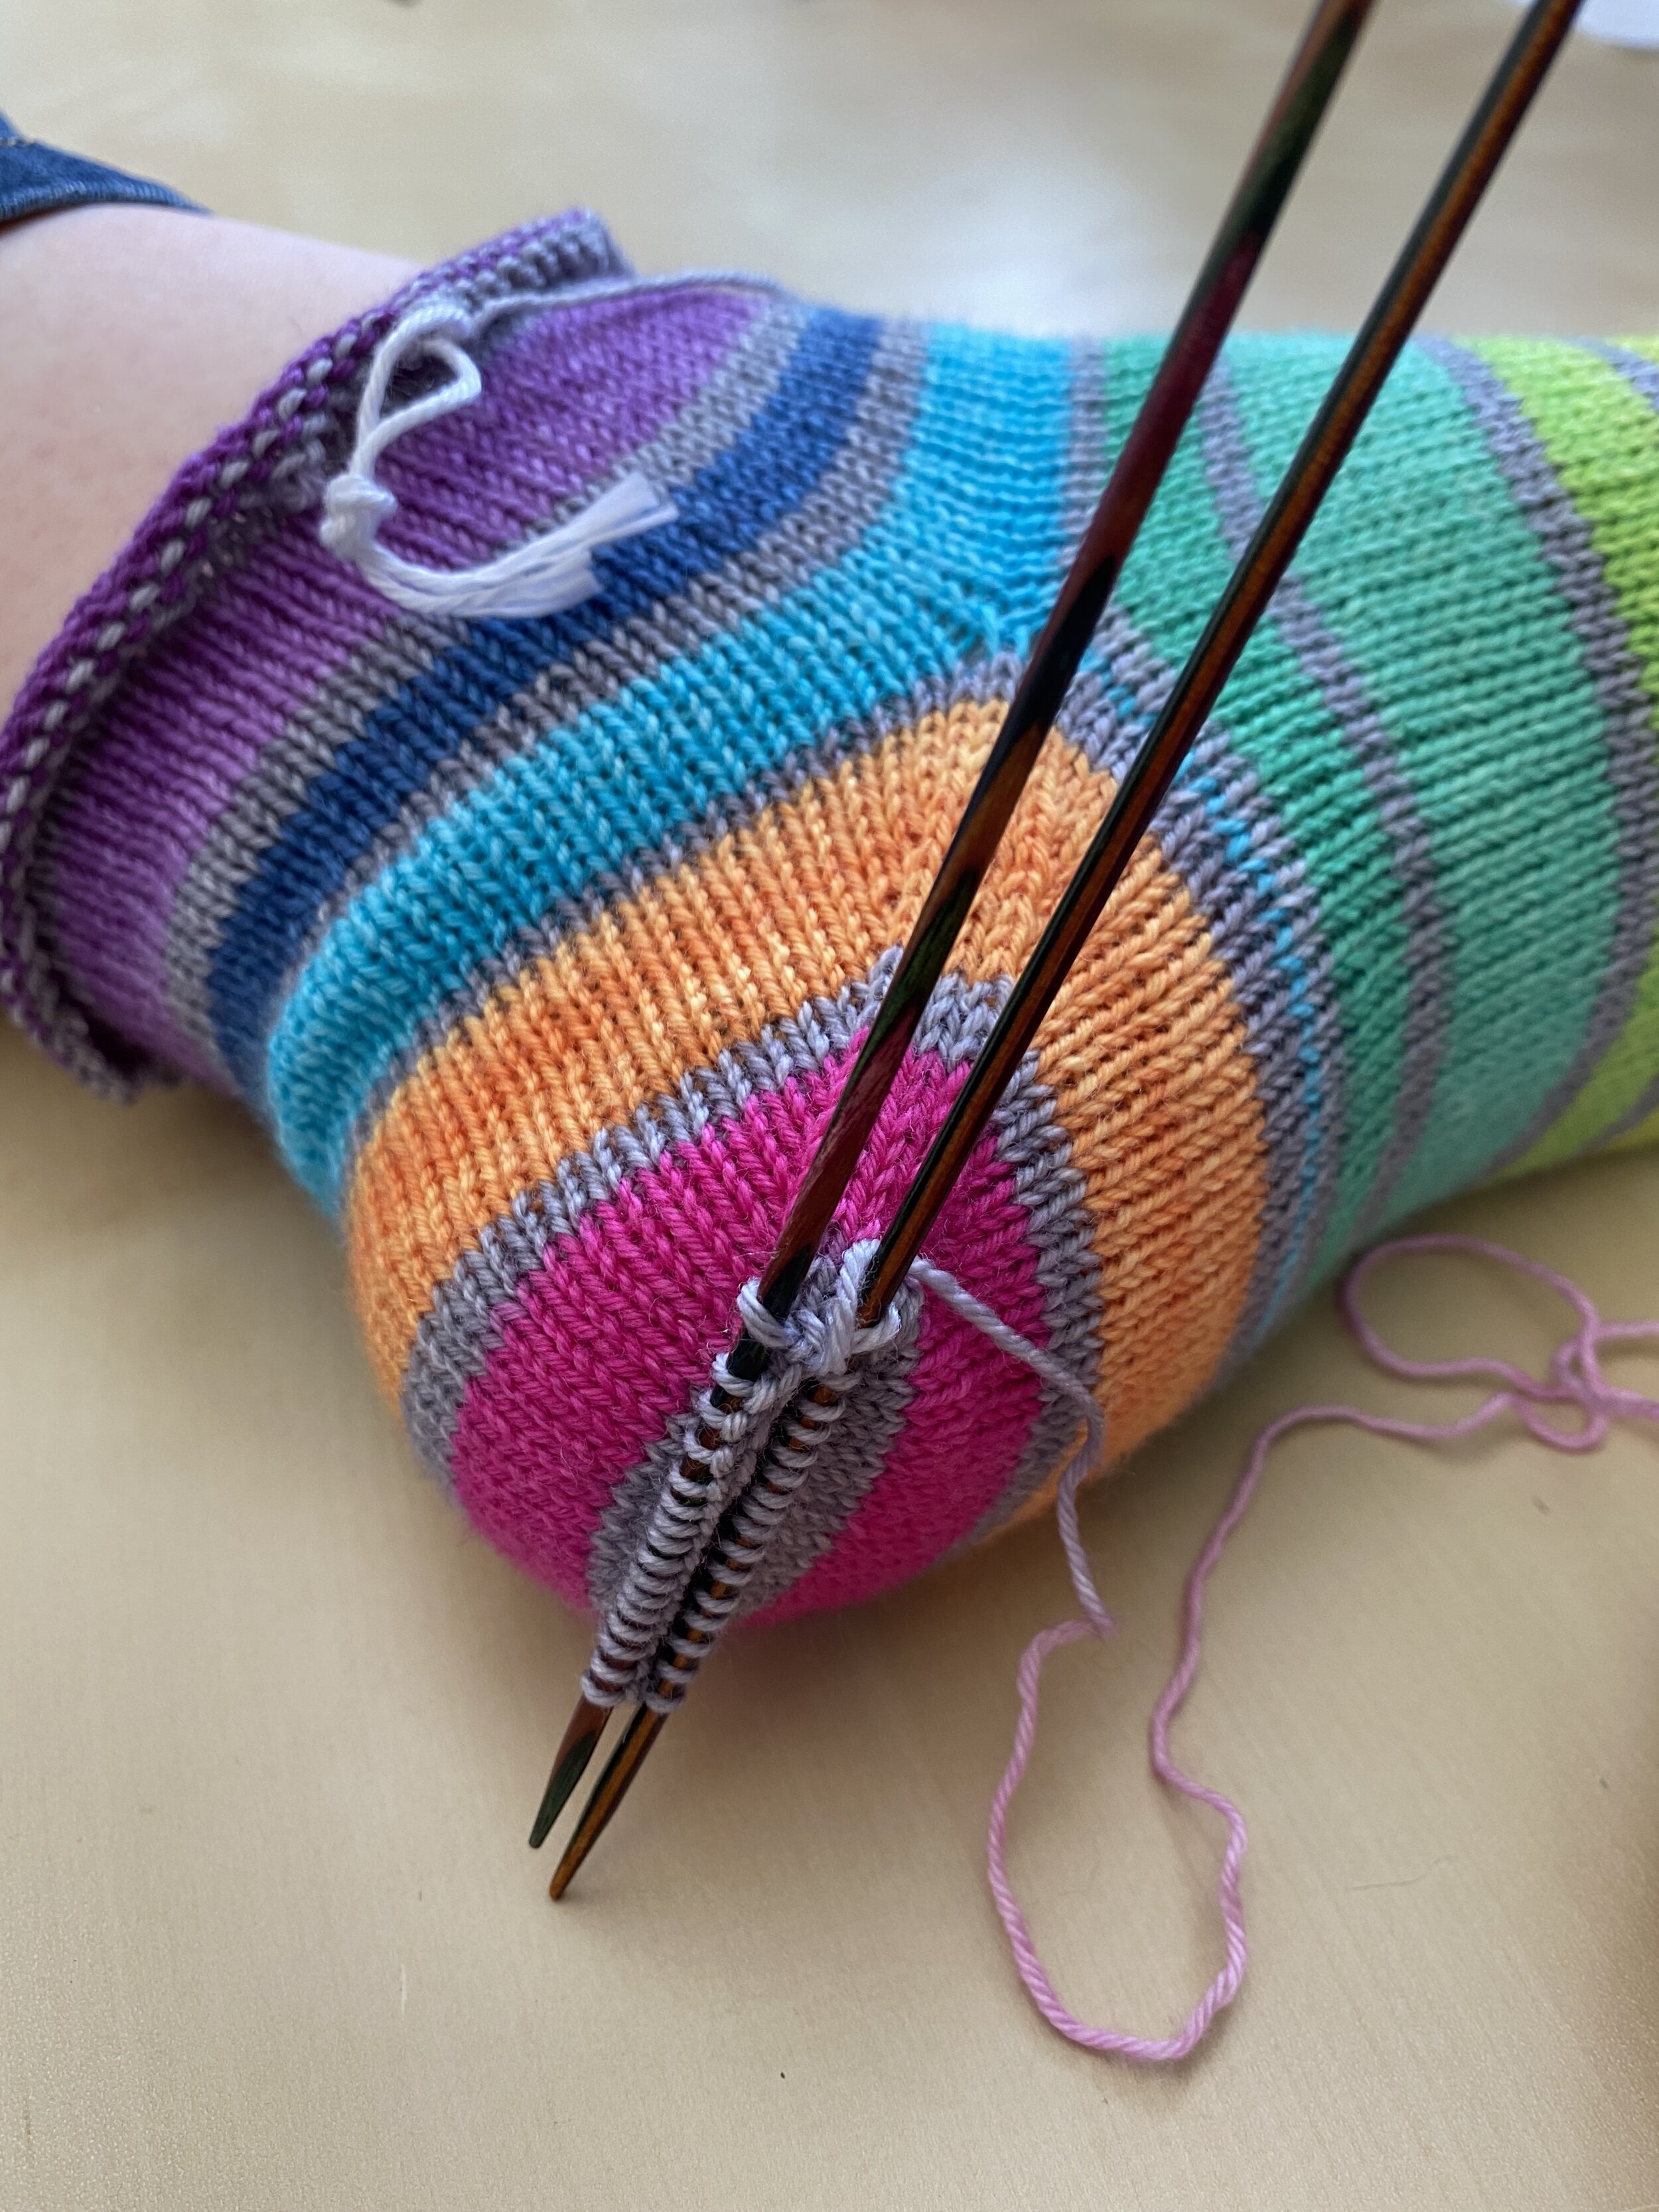
Now for the action! We’re going to pick up stitches on either side of our marked row, then give our knitting a little snip — I promise it’s not as scary as it sounds. This photo tutorial will take you through the steps, but if you’re confident about what you’re doing there’s a condensed photo run-through below. We would recommend using either a circular needle, or a tapestry needle and waste yarn, for picking up the stitches since this makes unravelling the row of stitches to open the heel significantly easier to manoeuvre.
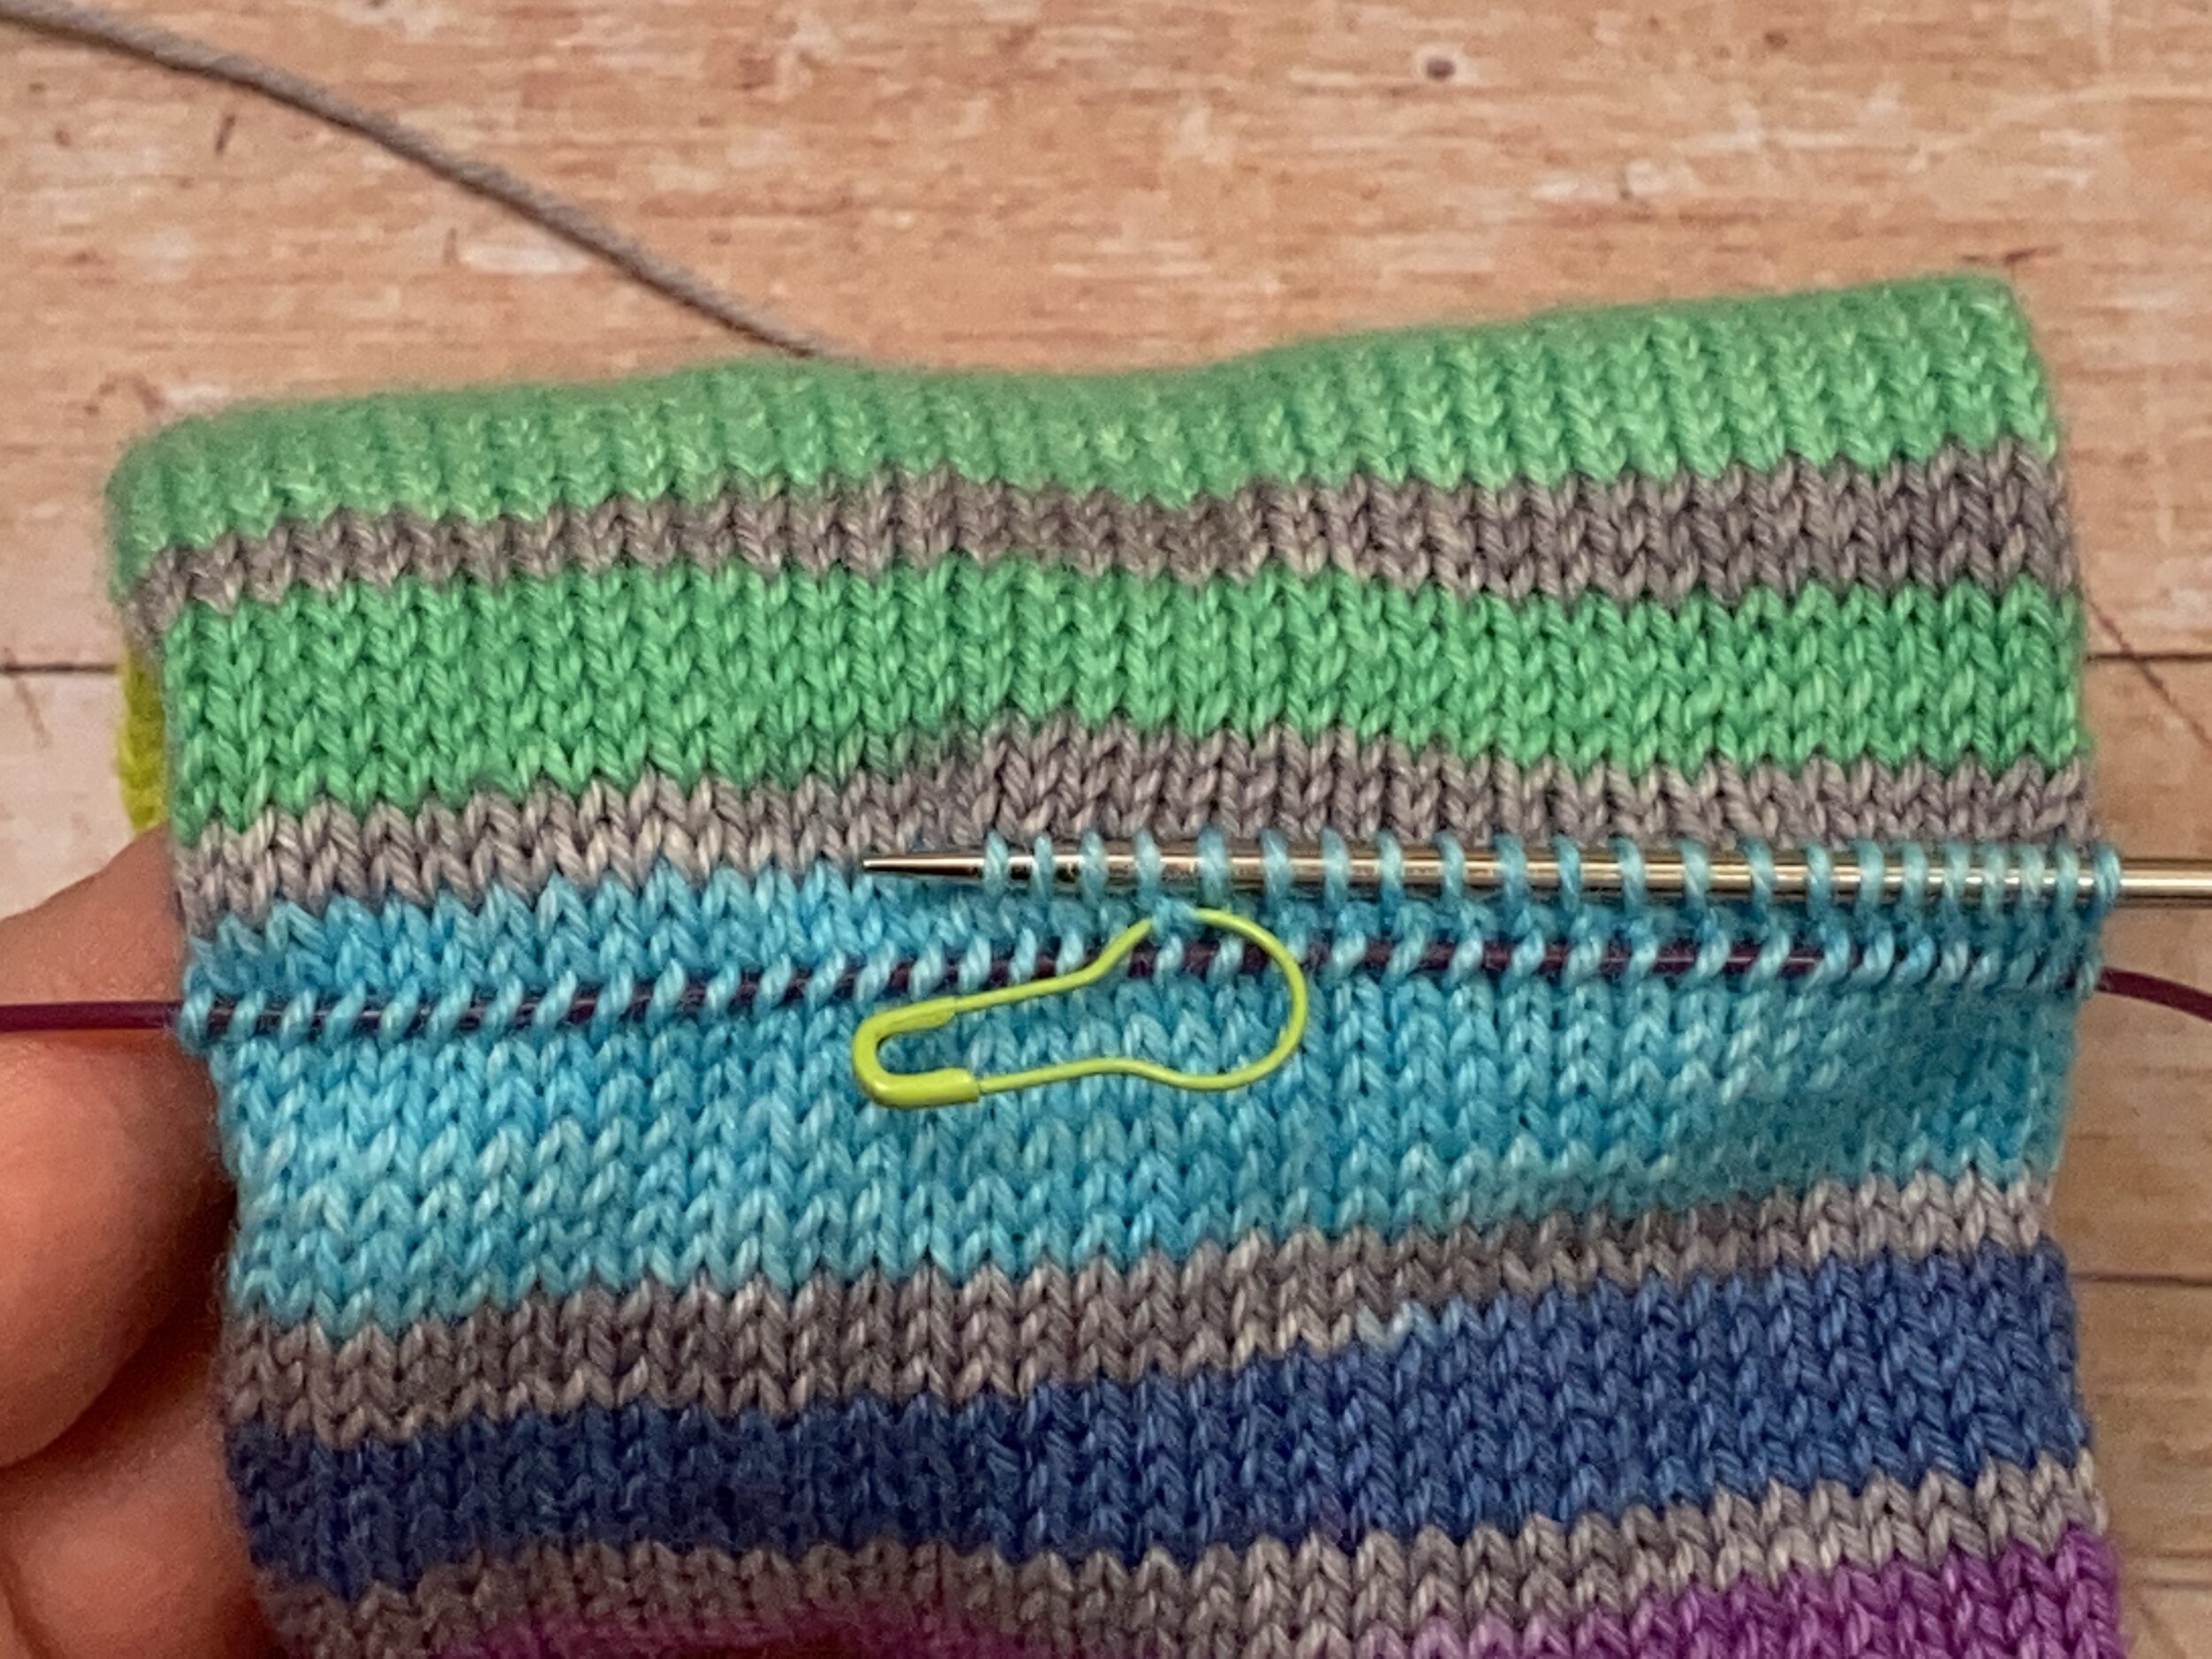
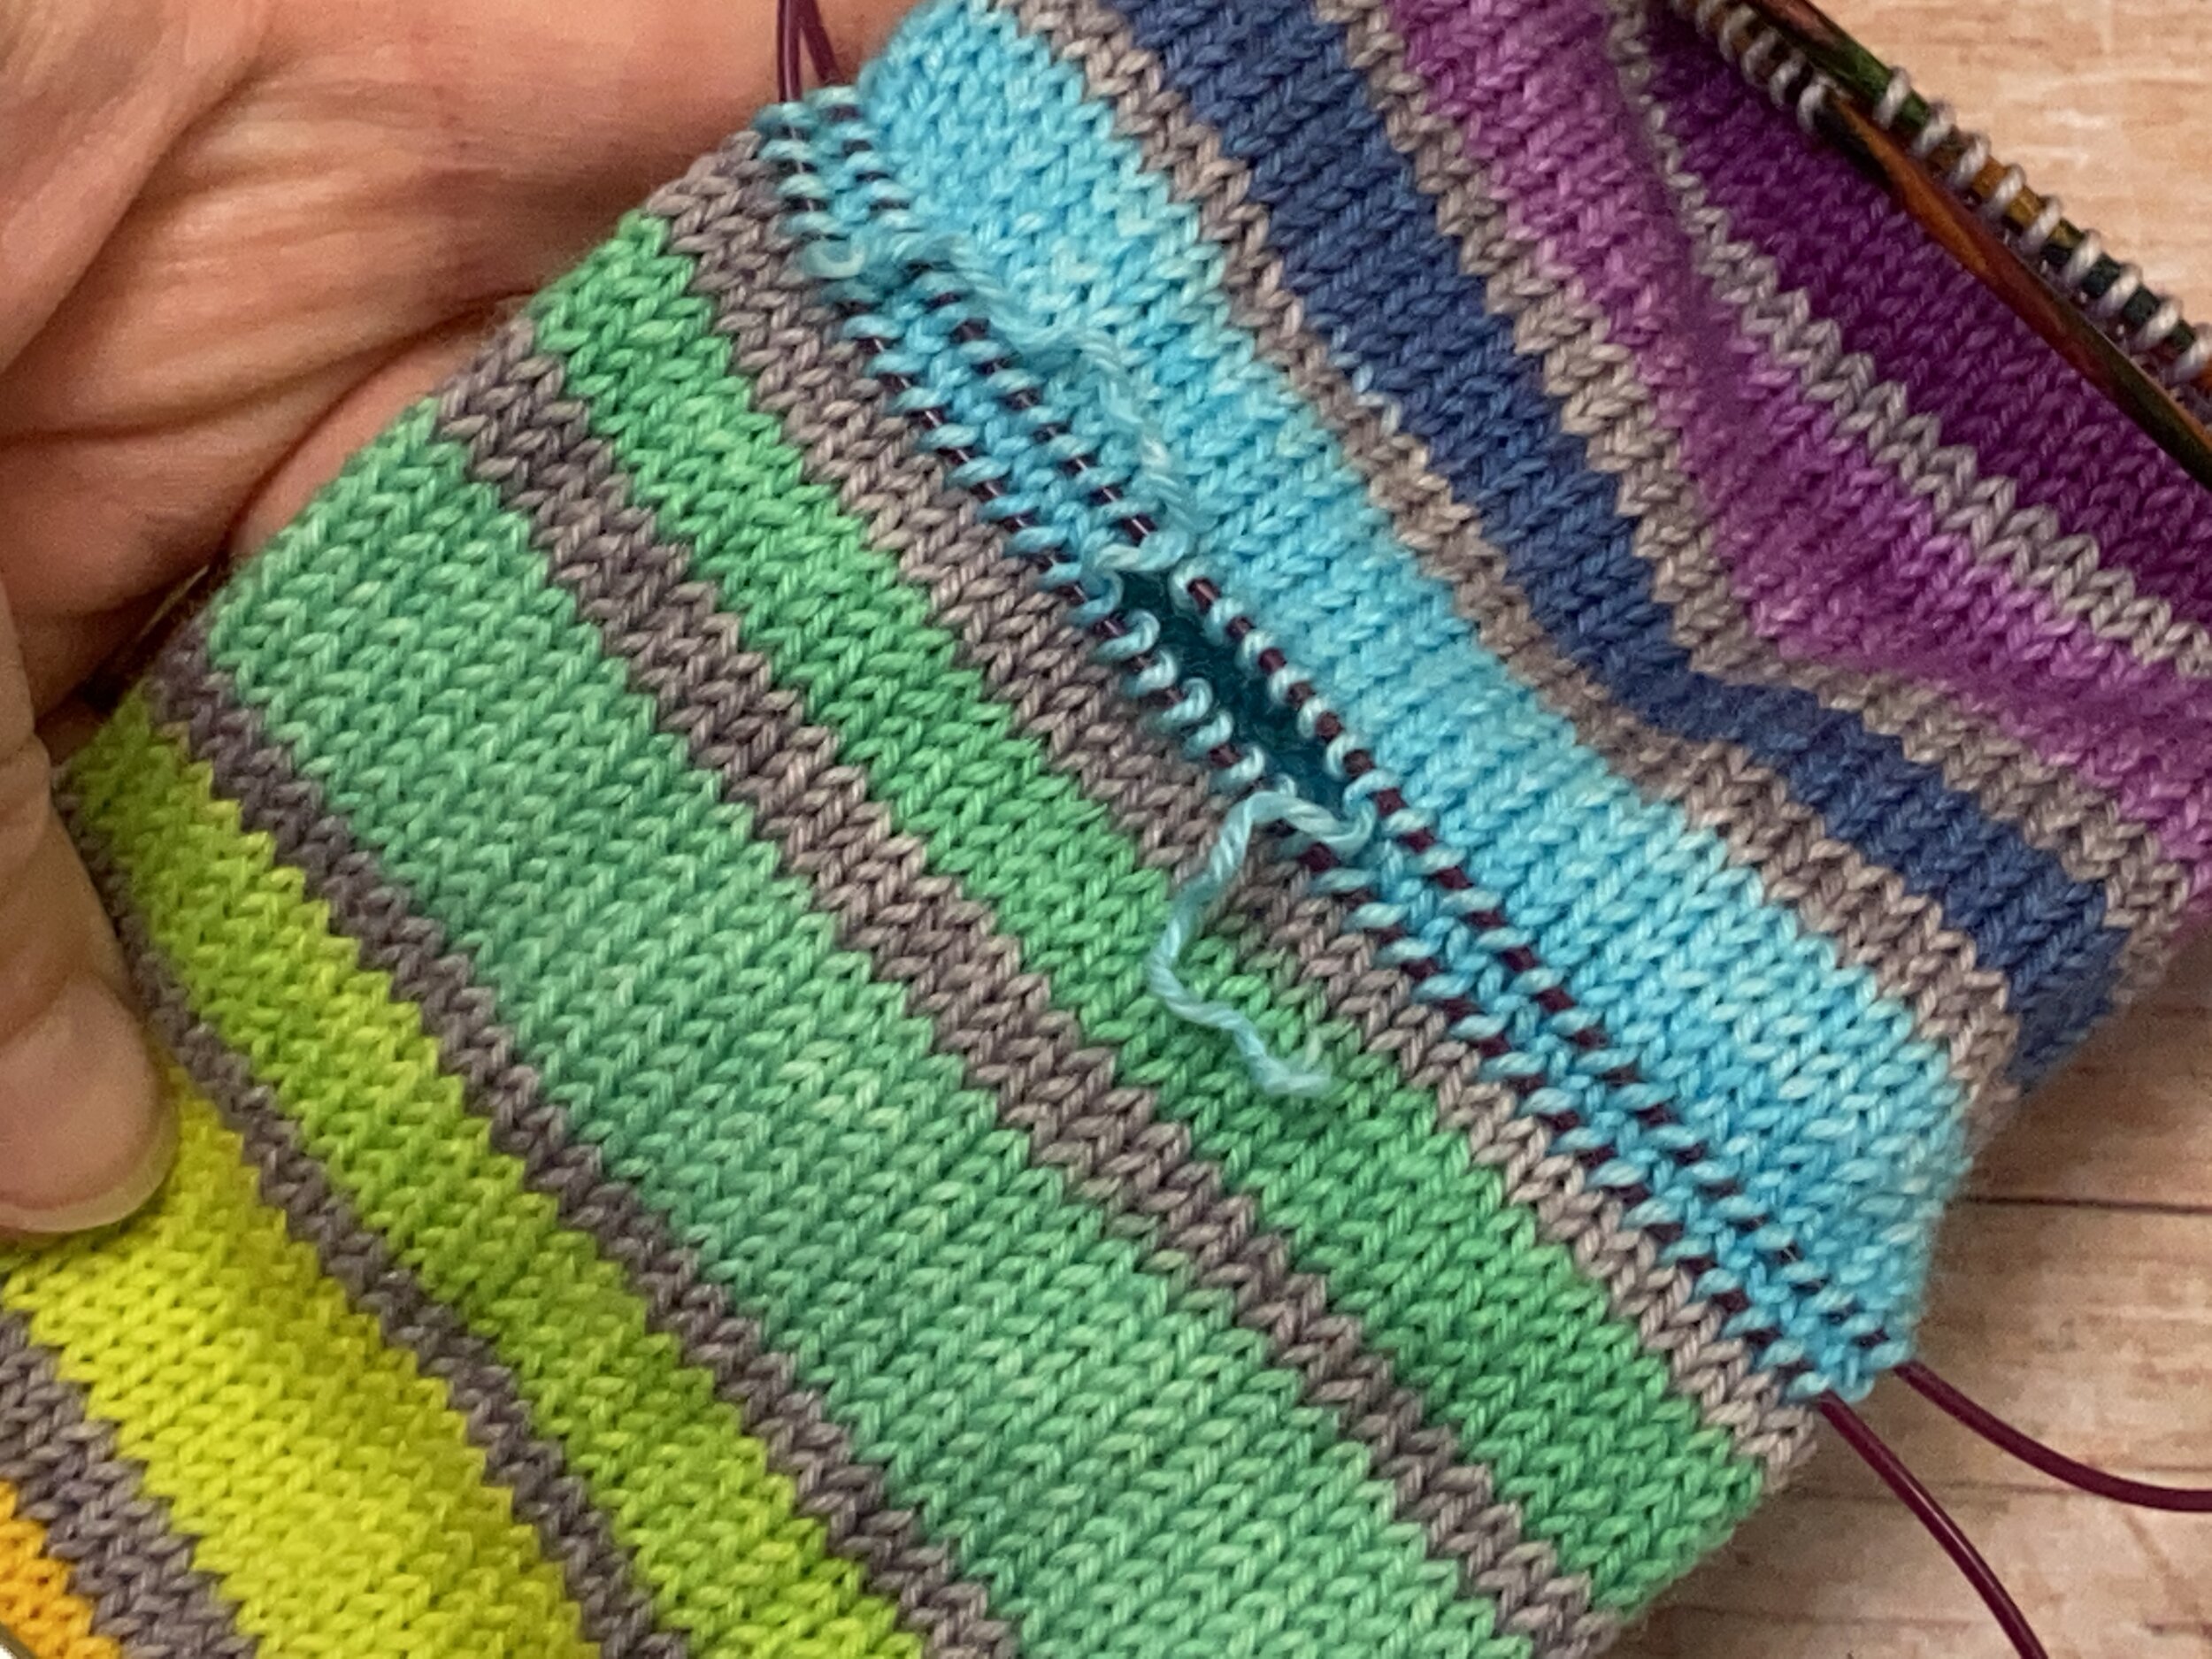
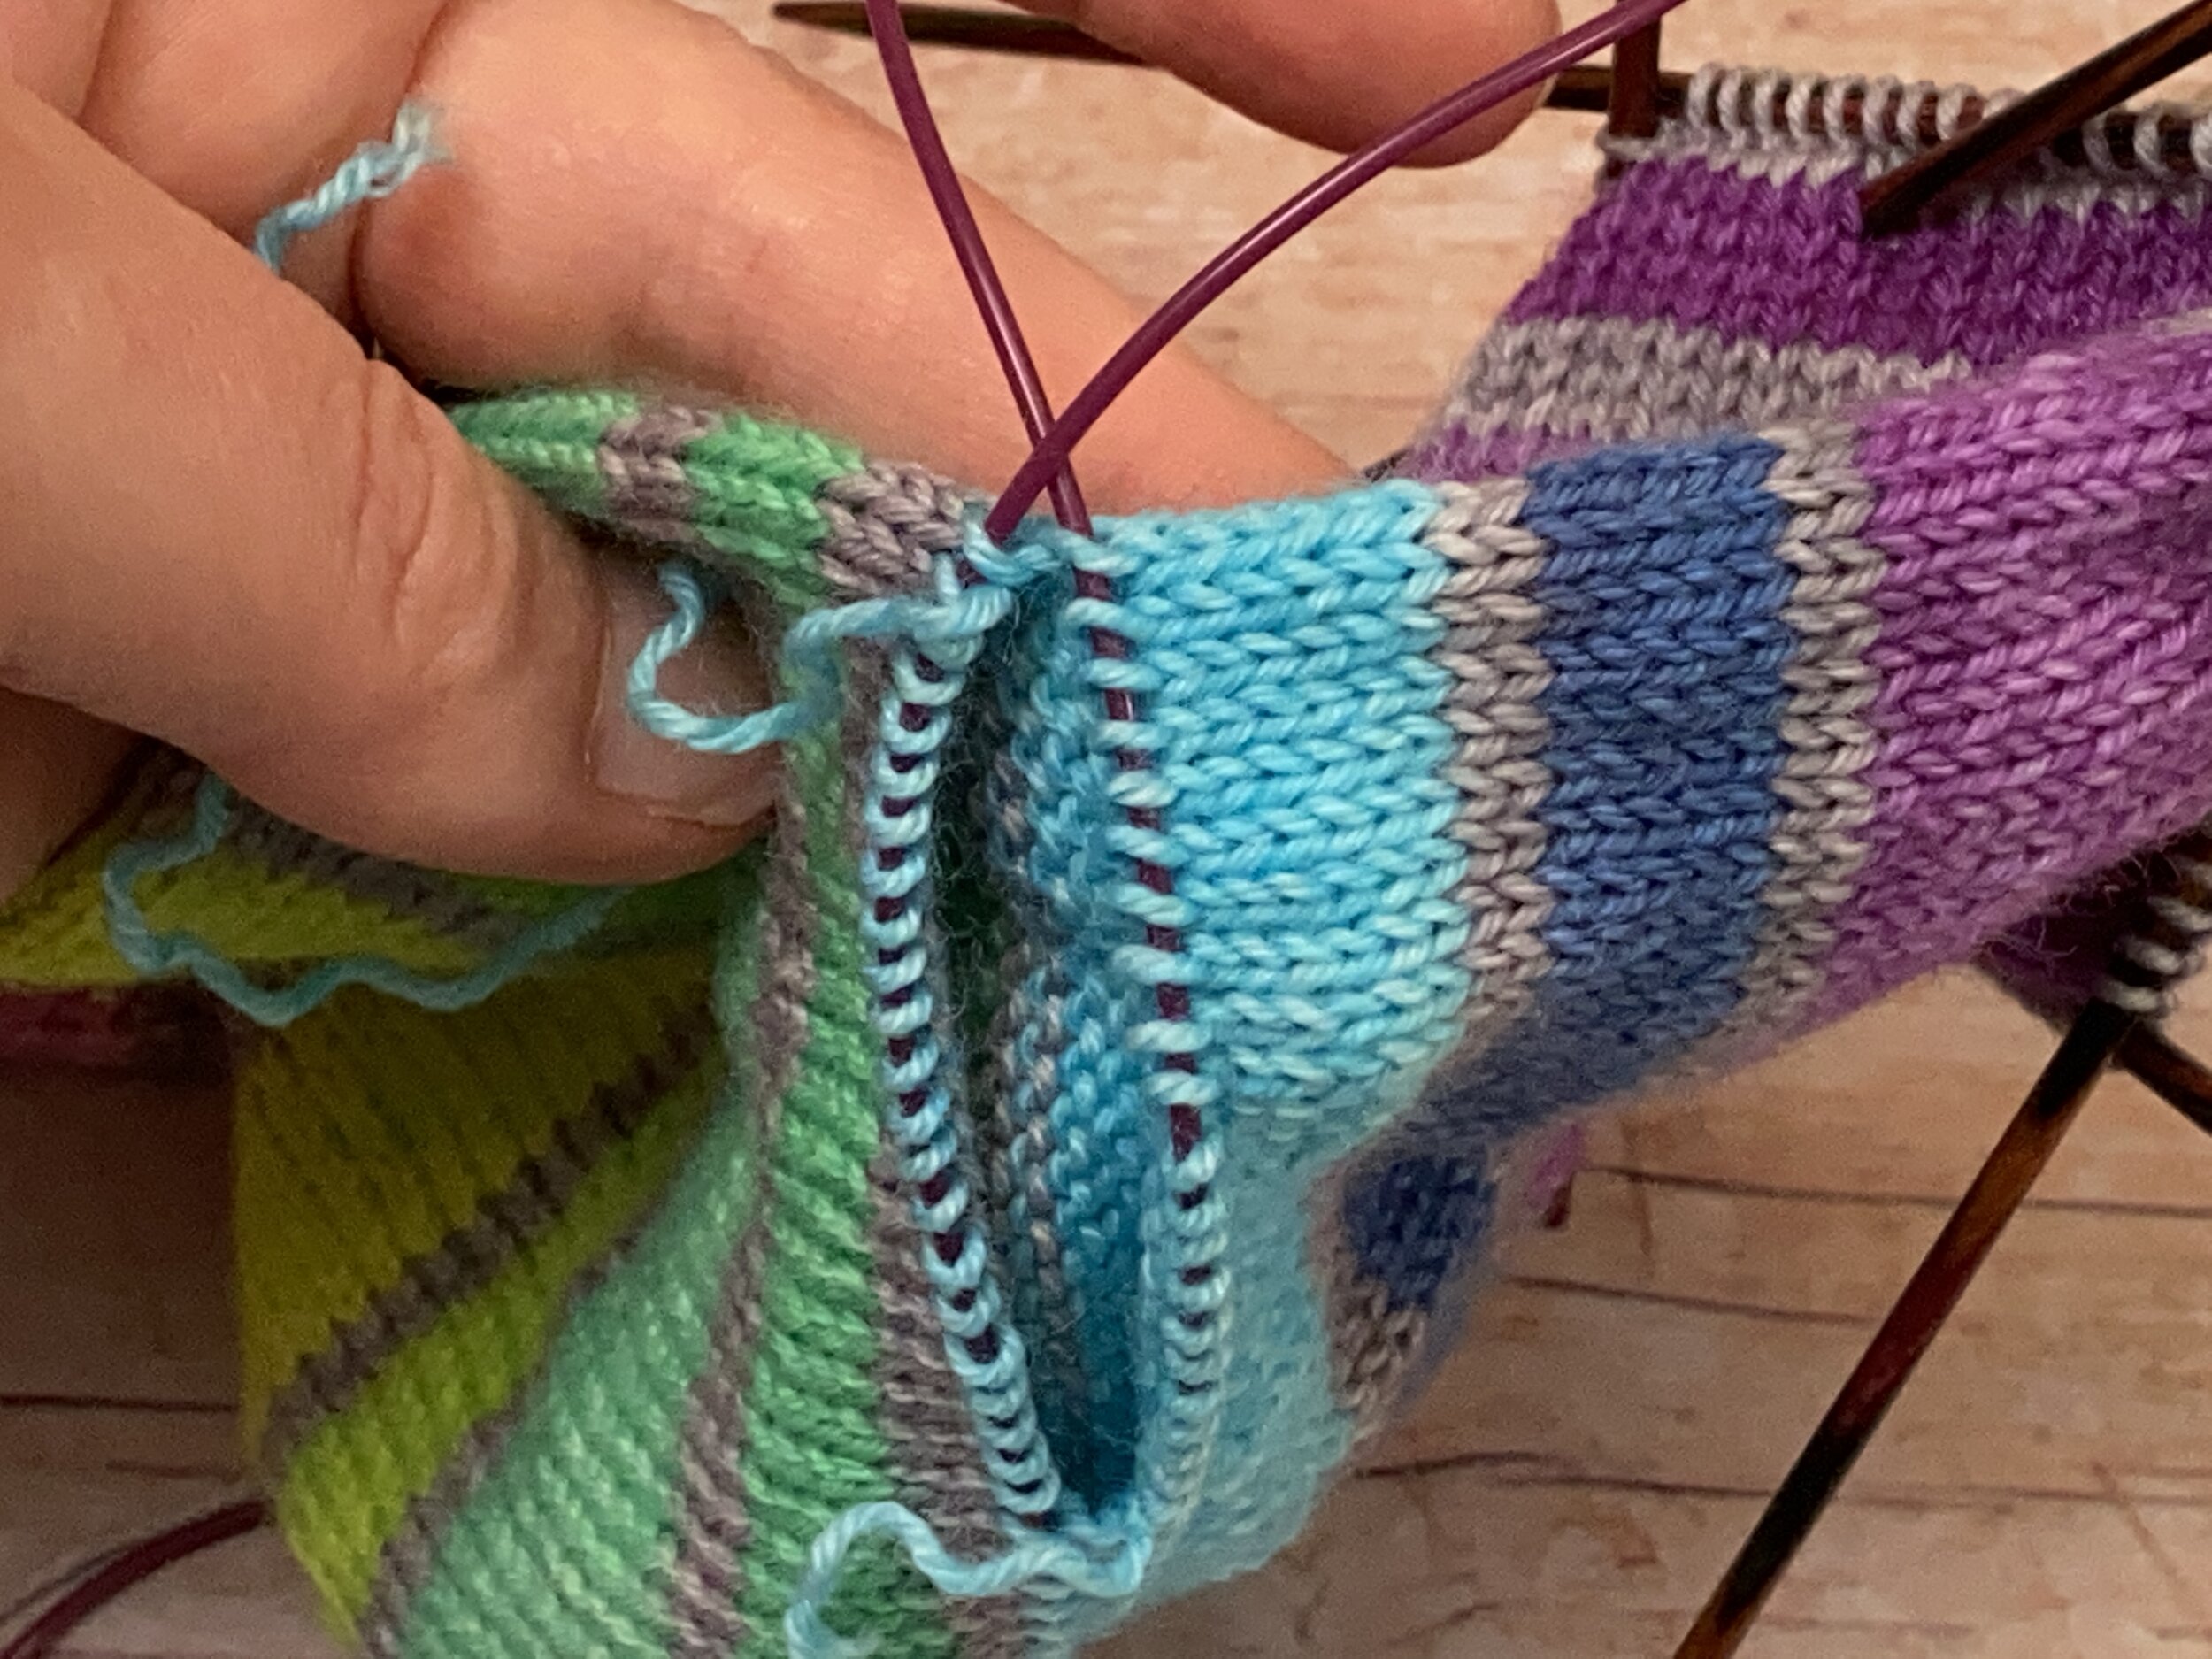
You’ll want to pick up between 50-55% of your total stitches along each side of your marked row, ensuring they are symmetrical around the centre of the toe. So for a 64 stitch sock, you’ll pick up 32–36 stitches below your marked row, rotate 180 degrees, then do the same again along the second side. Picking up 55% of the stitches gives you just a bit more room in your heels which can be helpful since our socks won’t have gusset. (And don’t forget to make notes so you can do the same thing for the second sock!)
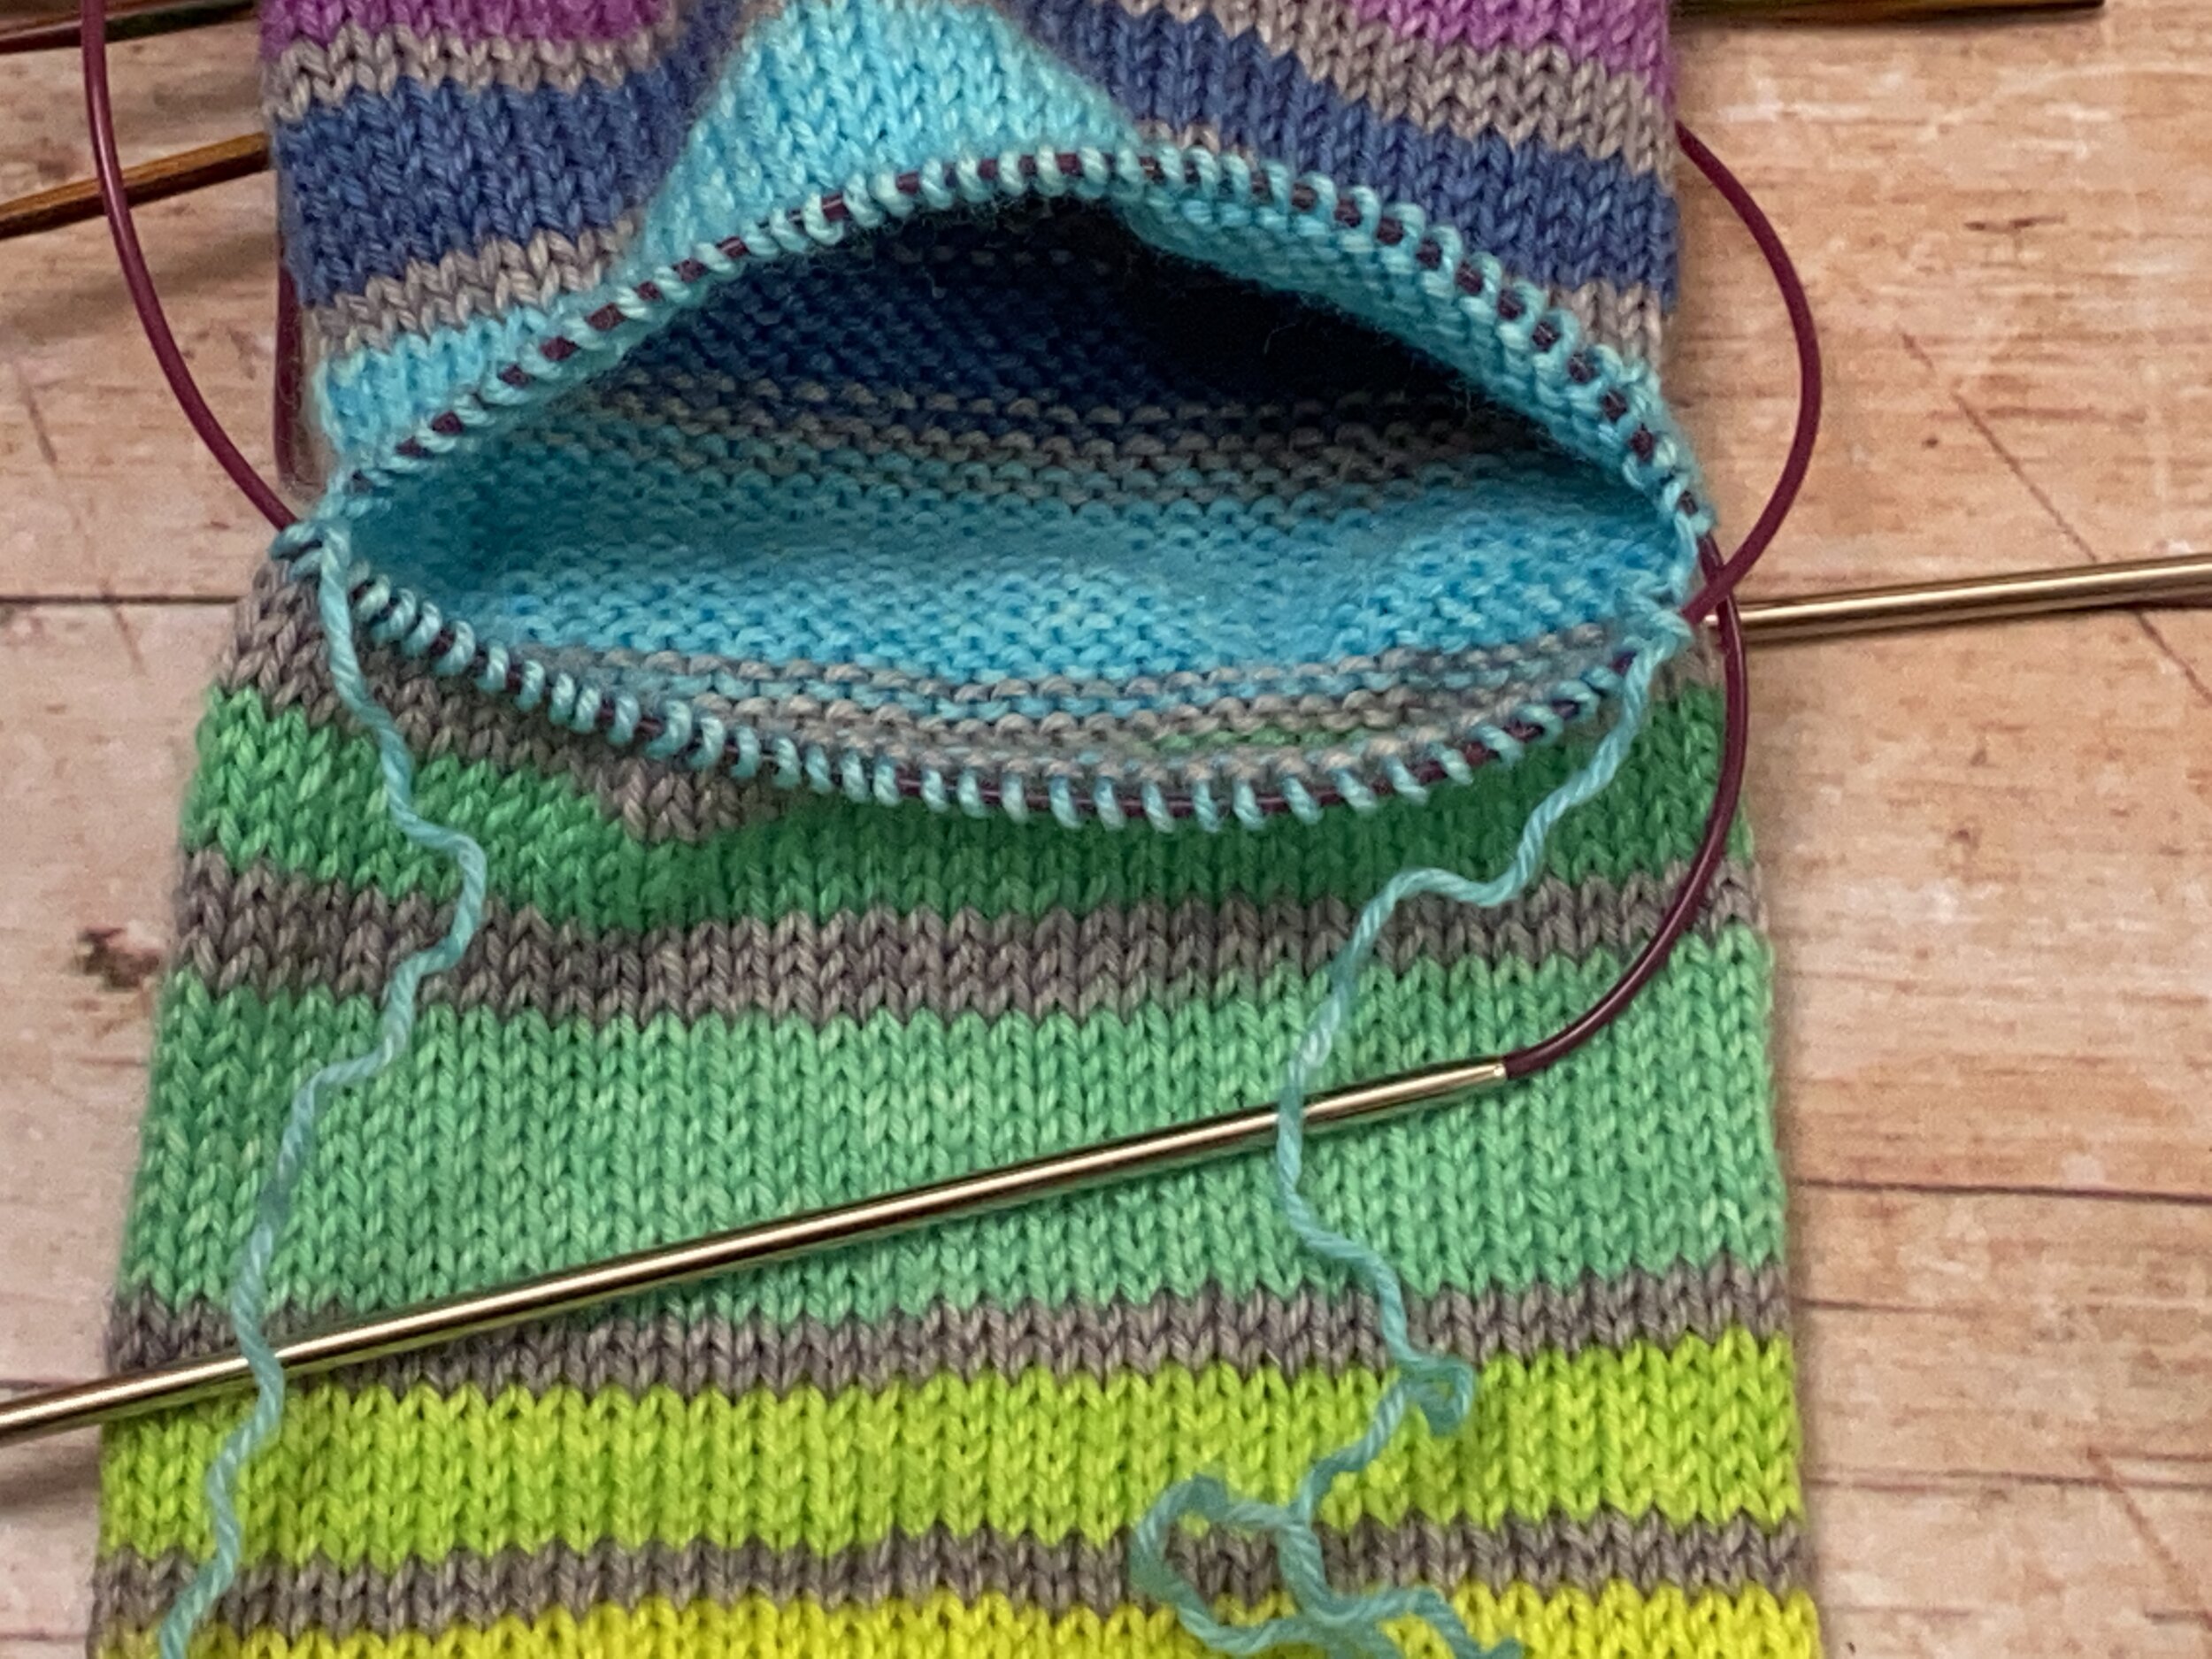
Once you’ve got your heel stitches on your needle, take a deep breath and give yourself a pat on the back. You’ve just done a Very Brave Thing! And now, it’s time to knit your heel!
Knitting the Heel…
Decide which yarn you will be using for your heel. It may be a separate contrast ball, or if you are aiming to use every scrap of a precious skein, then you can pull from the centre of the ball so that you are working from the other end. This avoids breaking the yarn and spoiling the stripe sequence, as well as having more ends to weave in.
Join in the yarn you’ll be using for your heel and knit a first round. You’ll probably want to pick up 1–2 stitches in the gap between the bottom of your heel and top of your heel on each side. This video tutorial was filmed with a heel flap and gusset in mind but the action is the same. After you’ve picked them up, you can decrease them away on a subsequent round or leave them for extra stretch-over-the-heel fabric. (Alternatively, don’t pick up any extras and you can use your ends to close up any gaps after you knit the heel.) Divide your stitches evenly into two sections, one for the back of the heel and one for the bottom of the heel. You can do this either with stitch markers or by arranging your stitches on needles accordingly.
Video Tutorial: Closing the Gusset Gap (watch on YouTube)
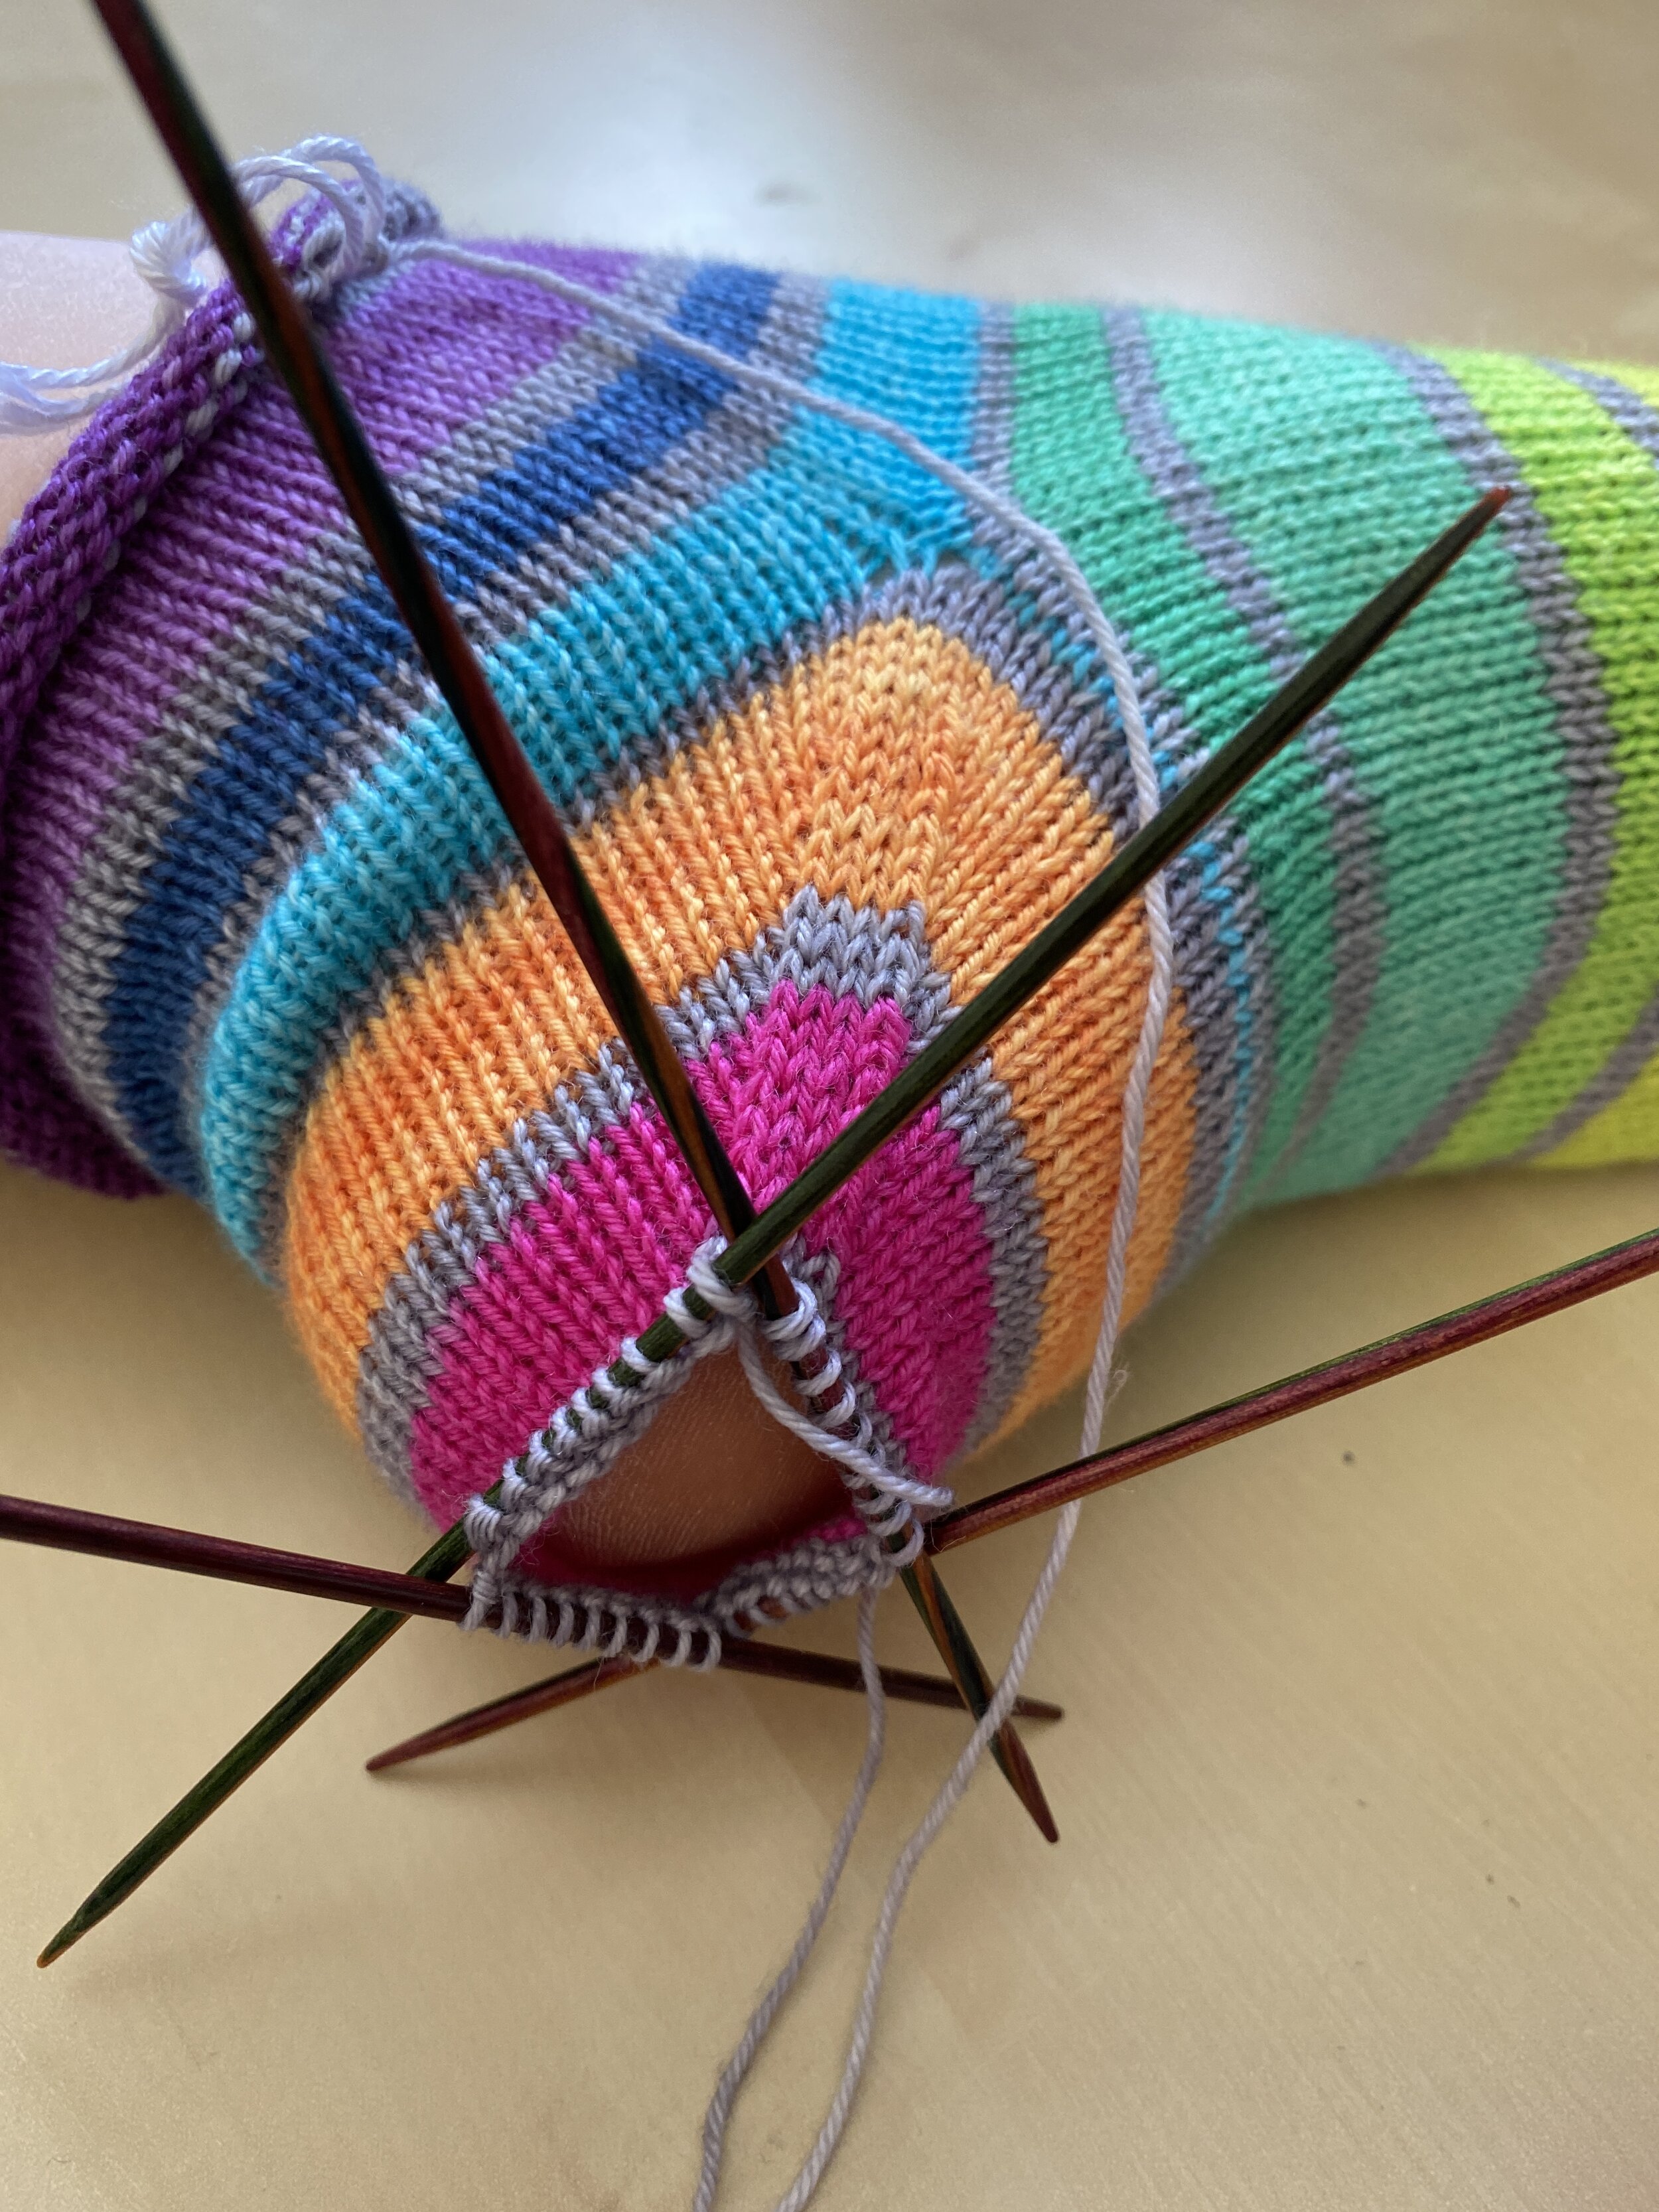
Now, work 2–8 rounds straight, knitting every round. How many plain rounds you’ll work will depend on the weight of yarn you’re using, the size of your heel and the height of your instep. You want approximately 1cm [0.4in] of straight knitting here. The photo below shows the straight section of the heel knitted in grey and orange.

Try on as you go and TAKE NOTES (and remember, the heel is only small, so if you knit it too small or too big the first time, you can just redo it!) Now that you’ve worked the straight section we will complete a wedge heel. You can also use a spiral heel, but to keep things simple here, we’re just providing one set of instructions.
Wedge Heel
A wedge heel is worked in the same way as a wedge toe, one of the most common toes used for top-down cuff socks. You’ll work as follows:
Round 1: *K1, ssk, work to 3 sts before the end of the first half of your heel sts, k2tog, k1; repeat from * across the second half of your round. 4 sts decreased.
Round 2: Knit.
Repeat rounds 1 and 2 until, when you try on your sock, the two halves of your heel just touch. If your sock recipient isn’t available to try on the sock, then working to 5–7.5cm [2–3in] wide (which is the same number of stitches that you cast on at the start of the toe) should be about right. Graft the back and bottom of the heel stitches together (this video shows you how).
And that’s all there is to it. With heels done, you can happily resume trying on your socks and admiring your handiwork as they grow!
In two weeks’ time, we’ll be talking about calculating increase rates on legs for calf accommodation (did an image of a baby cow hotel just spring to anyone else’s mind?). Until then, happy heel knitting. Do let us know how you’re getting on over in the The Knitalong Hub, where we’re also happy to answer questions!